Tuesday, August 20, 2013

Simply Solids Block for September


It's my month to choose the block for Simply Solids. I chose the Modern Strings Quilt Block. Please follow the instructions on the tutorial page but with the following size changes. 

I used Fat Quarters, so the strips are 9 inches each. Sew them together until the piece is around 9 inches square, and then trim each block into an 8.5 inch square. 


Untitled

Continue following the instructions on the tutorial page. The finished center should be 10.5 inches. I have provided 3 inch strips for the sashing. The block should finish at 15.5 inches. 

Untitled


Here is an example of the finished block. Thanks for participating!

Saturday, August 17, 2013

A New Quilt and Pillows


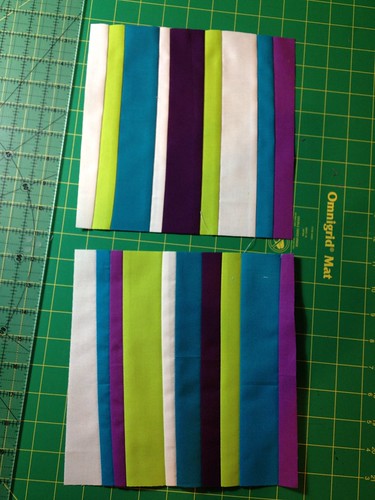
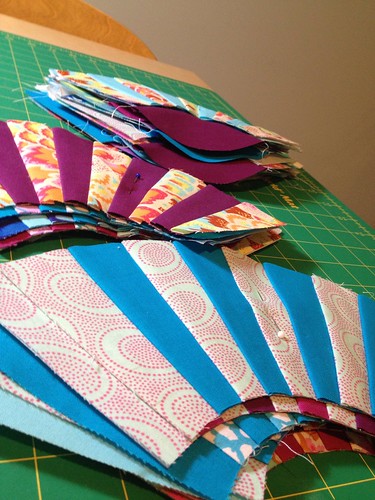
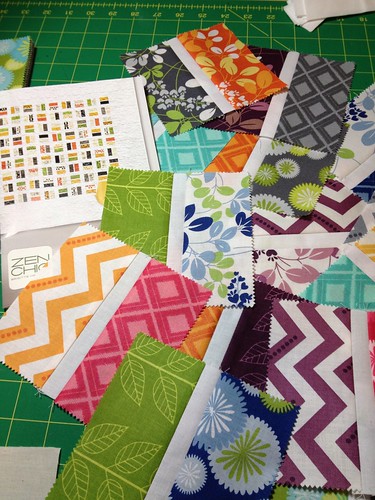
A little while back I fell in love with the Play a Card pattern from Zen Chic. I had a couple of charm packs from Simply Color, which seemed to be a perfect match. The colors are fantastic. Its a super easy pattern where the charm squares are cut in half and joined with a white strip in the center. 

Untitled


Once they are all finished, the fun part begins. Trying to decide which one to put where so that the same fabrics don't end up next to each other. 

Untitled

I've improvised a design wall by putting up Command hooks, and hanging a flannel sheet. It sort of works, but when I have to open the door, things don't stick as well. I must make something more sturdy, but thats for another day. 

This quilt was pretty large, so I sent it out to a long arm quilter and had an allover design quilted onto it. The result is very professional, but I feel guilty as it doesn't look as if I made it. In the end, it looks fantastic on my bed though!

Untitled

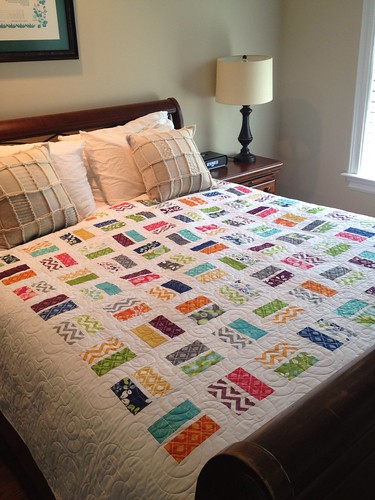
Since I am lazy on most days, I decided that I would mostly use the quilt at the end of the bed. It was looking a little boring though, and then I found this photo on Pinterest. Doesn't the chevron look like a perfect match? As usual, I decided that I could make that, so I took out my handy color card, matched up a solid, and ordered more of the chevron. I added an invisible zipper on the side, and here it is, a new look for my bed. 


Untitled


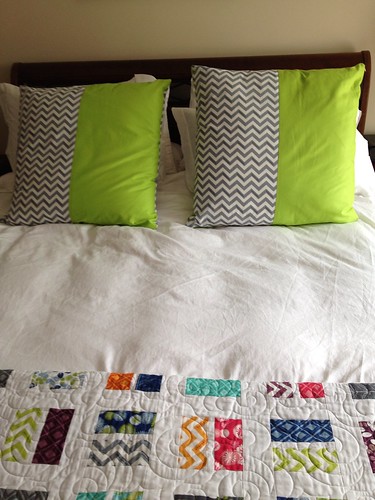
You can get a good look at the quilting in this one. 


Tuesday, August 13, 2013

Pickles and Pickle Dish


This month, my cooking and quilting have something in common, they both are related to pickles. A while back I saw this book at a book store, and fell in love with the quilt on the cover. 


Untitled


It looked vaguely familiar to me, which is should because I already had the book on my shelf at home. I decided that I wanted to make it, but not the entire thing. It is the motif that I love, and thought that there must be a way to  make it more modern although compared to traditional Pickle Dish quilts, this one is already very simplified. Here is a photo that I found to give you a better idea. I decided that I would only do four of the blocks, which is 32 of the striped sections. It is foundation paper pieced, which means that the striped sections are sewn onto a paper that I printed out, sewing on the lines. 


Here is a photo of the back of one of my completed sections.


Untitled


Here are a bunch of them finished and ready to be sewn together.


Untitled


I've finished most of them, and have started sewing the edges on, which a bit tricky as its all pieced on a curve.


Untitled


Here we are paired up and ready to go. I'll keep you posted as work progresses. 


Now, on to actual pickles...


This season I decided that rather than buying my veggies at the supermarket, that I would subscribe to a CSA, basically a farm box that I pick up every week. We've been getting lots of cucumbers, especially the small variety. I love pickles, and decided as usual that I could make them myself. Its super easy, so heres what you need if you want to try it. 


Untitled

From the top left and moving to the right.


1. Small pickling cucumbers

2. Garlic, Pickling salt (this salt is free of additives, and will keep your pickling liquid clear), Dill seed, Mustard seed, garlic cloves, white vinegar (not pictured).
3. Ball Jars, I got the wide mouth quart variety available at the hardware store.
4. Large pot of boiling water.


First you need to sterilize the jars, lids, and rings. You can do this in the dishwasher, and use them immediately. I decided to boil them for 10 minutes in the pot of boiling water. Meanwhile in another pot, put 2 cups of white vinegar, 2 cups of water, and 2 tablespoons of salt. Bring this to a boil and then turn off the heat. 


In each jar place a couple of garlic cloves depending on how garlicky you want it, or not, 1 tsp each of dill seed and mustard seed. Cut a little off the top of each cucumber, and if you like, cut them in spears, I left mine whole. Put as many cucumbers as you can in each jar.


Pour the salt/water/vinegar into the jars to within an inch of the top. Close the jars, but don't screw the bands too tight, you can adjust that later. 


Gently place the jars into the boiling water, making sure that the water covers the tops of the jars, and boil for 15 minutes for this size. When you take them out, the lids may not be sucked in yet, it sometimes takes a while. Check them after a while, the lids should be flat, and you can tighten the bands. If they are not flat, they are not sealed, and you should store in the fridge after cooling. Hopefully this should not be a problem. Mark the top of each jar with the date so that you know when you made them. Put them in your cupboard for up to a year. I opened a jar after 2 weeks and they were delish! Just like a deli. 


I pick my next box up today and am going to try making sweet pickles. I'll keep you posted!


Monday, August 12, 2013

Handmade by Michelle

Welcome to Handmade All Around, my new blog all about things made by me. I've been making things for most of my life. I started out making model airplanes and cars, and then it was on to knitting. I think that I found my niche with fiber. I like to say that I am good with anything that involves a string. So, thats what this blog is going to be about, my adventures in crafting, mostly knitting and sewing, with some cooking thrown in there and who knows what else! 

Let me tell you a few things about myself before I get started. I used own a yarn shop when I lived in London, then we moved back to CT four years ago. I started sewing quite a bit, mostly pillows and clothing. I want to try it all, pattern making, draping, quilting, and anything new that I can learn. I like to figure it out myself if possible. I also like to cook, so don't be surprised if there are a few foodie things thrown in for fun. When I am out and see something pretty such as jewelry,clothing, or accessories, my first thought is "I could make that", and often times I go home and try it out. 

So here I go. I have a few projects on the go, and hope to get them up here over the next couple of days. In the meantime, check out my Finished Projects page so see what I have been up to.